Major changes in CannyLab version 2.xx
This page provides an overview of all major changes that occurred in CannyLab IDE version 2.
- Improving stability and performance
- New features and capabilities of CannyLab
- Major changes in the interface
- Composite blocks
- Simulator
- Errors and warnings
- Create SFX
Diagram optimization and updated firmware
In CannyLab version 2, you can now optimize the function diagram when uploading it to the controller. Optimizing the diagram allows reduces the the amount of memory consumed by the program, while the result of its operation remains unchanged. This results in improved overall performance for your controller and lets you create larger and more complex diagrams.
Function diagram optimization can be enabled or disabled using the toggle switch Diagram optimization when writing to device in the CannyLab application settings window, available under * Tools → Settings * in the Cannylab menu bar. The option to toggle diagram optimization is also provided for SFX files in the dialog «Create SFX».
Also in CannyLab version 2, the controller firmware files have been updated for all current CANNY controller models.
** Note: ** Before uploading a diagram made in CannyLab version 2 into the controller, replace your current controller firmware with up-to-date firmware that comes with CannyLab version 2. It is located in the corresponding subdirectory “\ ccx \” of the CannyLab installation directory.
New features and capabilities of CannyLab
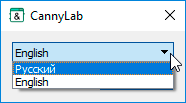
Language selection dialog
When launching the development environment for the first time or restoring the default settings, you will be presented with a dialog for selecting the application interface language.
Independent installation of the new version and import of settings from the previous one
Starting with CannyLab version 2, you can install and use the new and previous versions of the IDE independently.
When starting the development environment for the first time or restoring the default settings, you will be presented with a dialog box offering to migrate settings from previous versions of CannyLab.
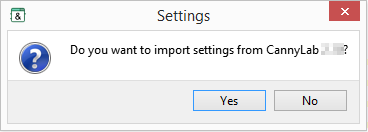
** Note: ** When transferring settings to a new version of the development environment, only those parameters that were present in the previous version will be set, for example, the option to display function blocks (list / icons) in the menu.
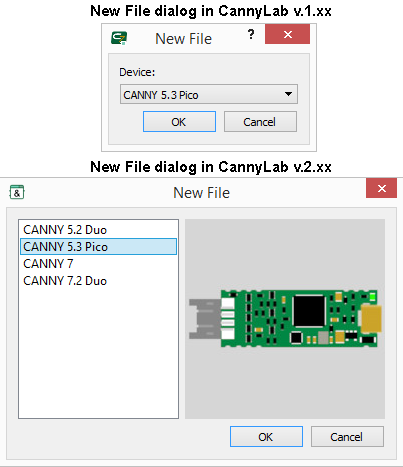
Dialog for choosing a controller when creating a new function diagram
The Create File dialog taht appears each time you create a new function diagram is updated. The new dialog design displays thumbnails of the selected controller, and there is now a switch to save the default controller selection.
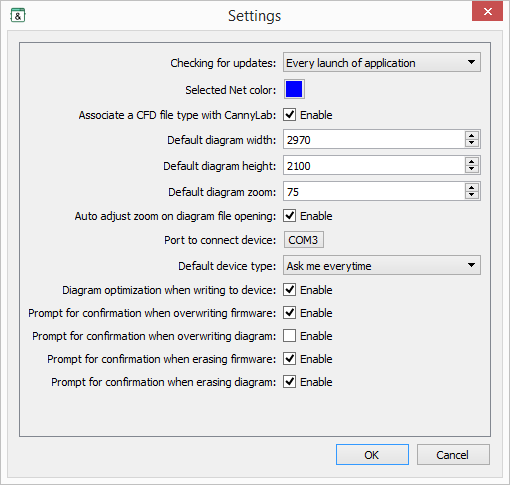
Setting the default user selection
Another very useful feature is the new option to remember the user’s choice in some dialog boxes:
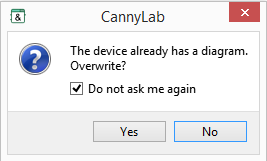
This settings can be canceled at any time in the “Settings” window available via “Tools” → “Settings” in the menu bar:
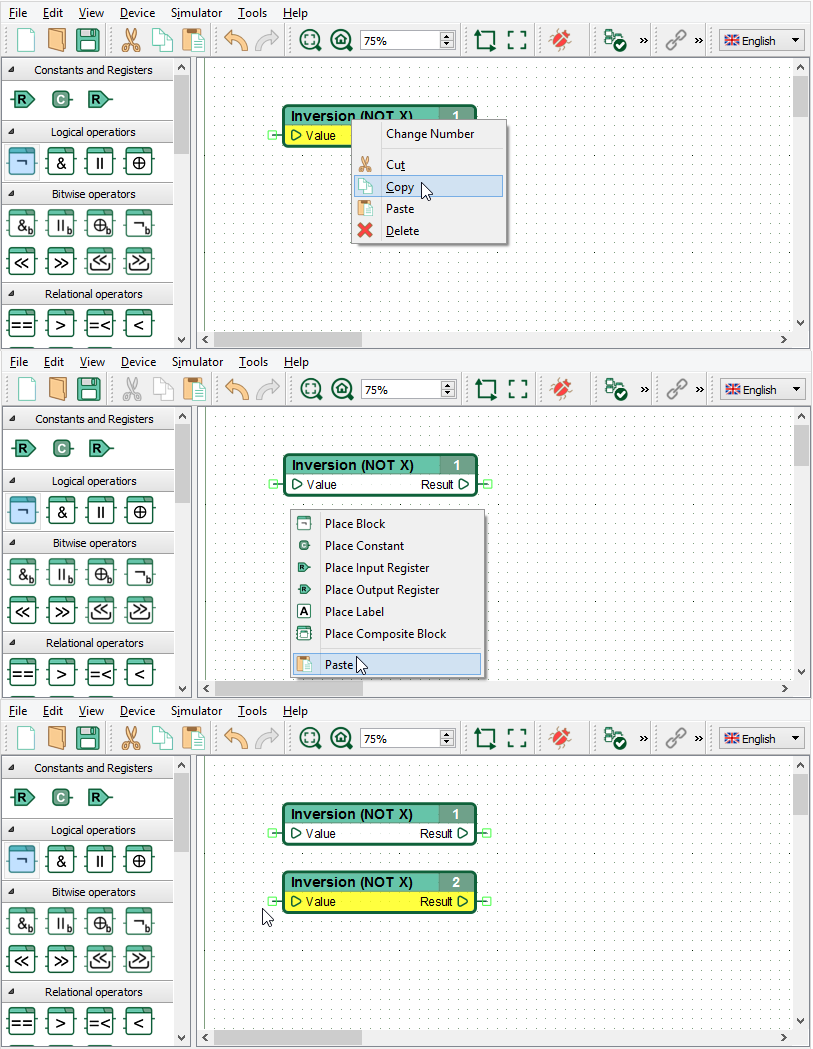
Paste copied blocks at the mouse cursor position
Starting with CannyLab version 2, the copied and cut elements of the function diagram are inserted near the current position of the mouse cursor. In previous versions, they were always placed in the upper left corner of the workspace.
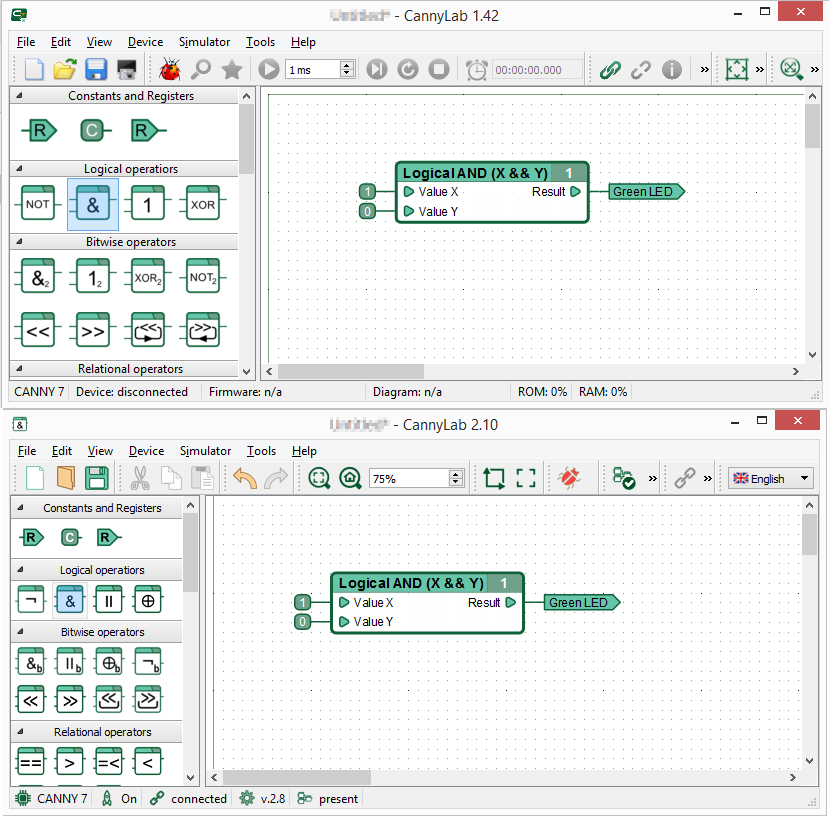
Major changes in the interface
The user interface of CannyLab v2 uses an updated set of graphical elements:
More customization options are now available.
Starting with Cannylab 2, it is possible to fine-tune the elements in the toolbar by using the “Editor Toolbar Visibility” dialog box, which can be called using via the “View” → “Customize toolbars” menu option.
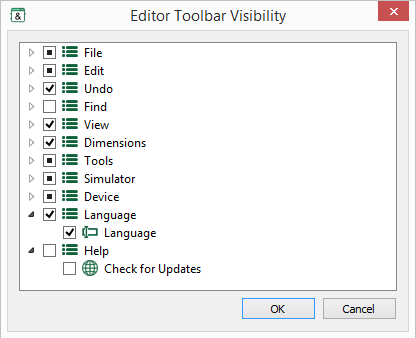
You can now move toolbars and dock them to any of the borders of the development environment window.To do this, you need to disable the “Lock Toolbars” switch in the «View» menu or the context menu of the toolbar:

After turning off the locking mode of the toolbar, you can freely move the toolbar elements and dock them to any of the four borders:


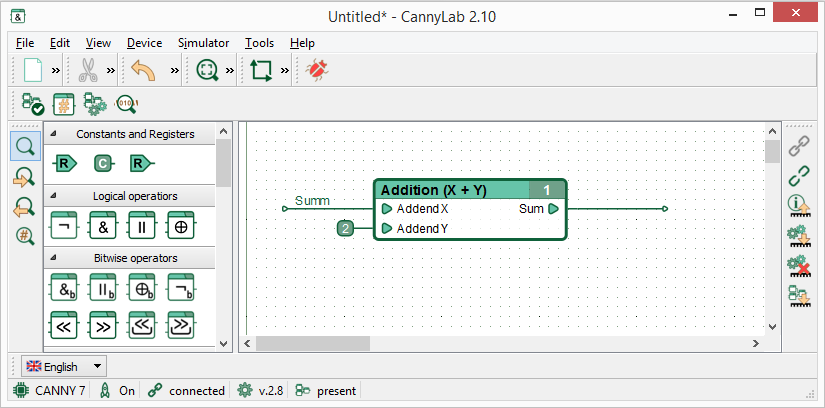
Composite blocks
One of the key new features in CannyLab version 2 is the «Composite Block» element. It significantly expands development possibilities.
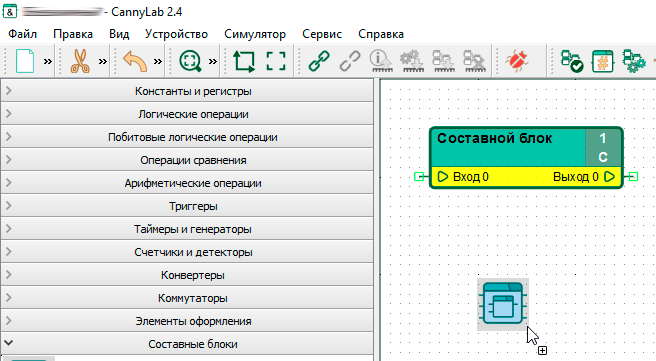
«Composite Block» essentially lets you create your own function block within the development environment. When making your own «Composite Block» element, you can customize the following:
- all inputs and outputs, including the amount, names and arrangement;
- internal function diagram;
- name;
- width.
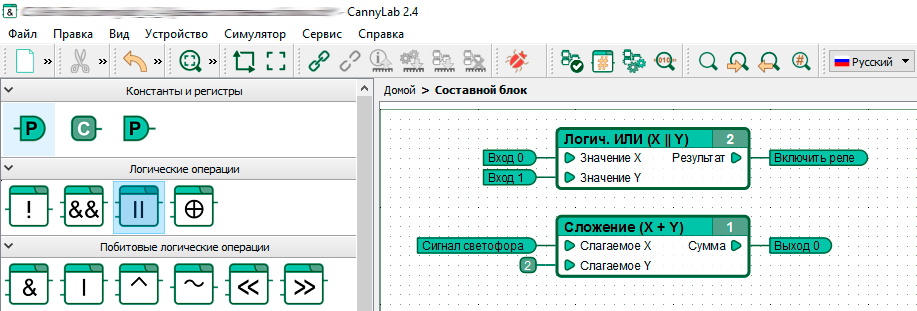
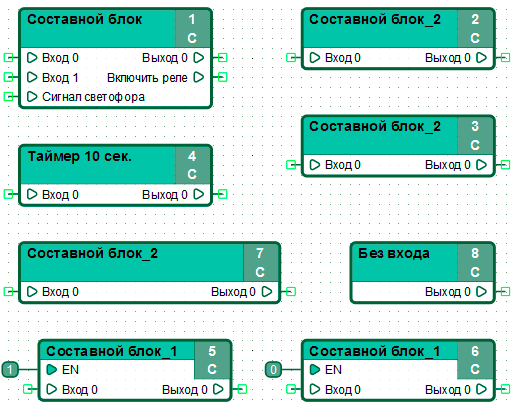
You can control the execution of the composite block by using the “EN” input. When a value greater than zero is applied to the “EN” input, the composite block is executed within the loop of the function diagram. If a value equal to zero is applied to the “EN” input, then the composite block will not be executed within the diagram loop, which lets you save the controller resources to use them, for example, on other composite blocks.
Composite blocks can be nested within each other:
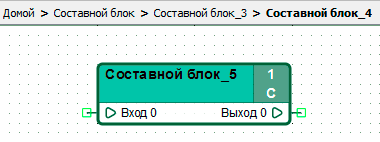
Note: One important way to use composite blocks is to create stand-alone libraries of elements that can be transferred to various function diagrams, including those intended for different types of CANNY controllers. To this end, the use of read and write registers, as well as named constants is not available in internal diagrams of composite blocks.
Simulator
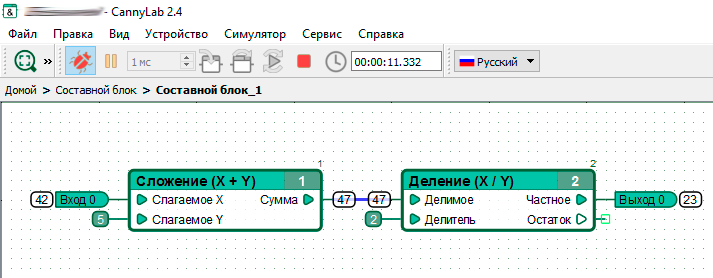
In the updated simulator mode, you have access to diagram debugging tools updated to work with composite function blocks.
The simulator works at any nesting level of the function block hierarchy.
For the convenience of step-by-step debugging of function diagrams containing composite blocks, the «Step» command available in CannyLab version 1 has been replaced by the «Step Into» and «Step Over» commands.
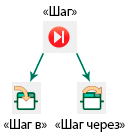
Step Into steps into the composite block and pauses the execution within its internal diagram, allowing you to execute the internal diagram step by step.
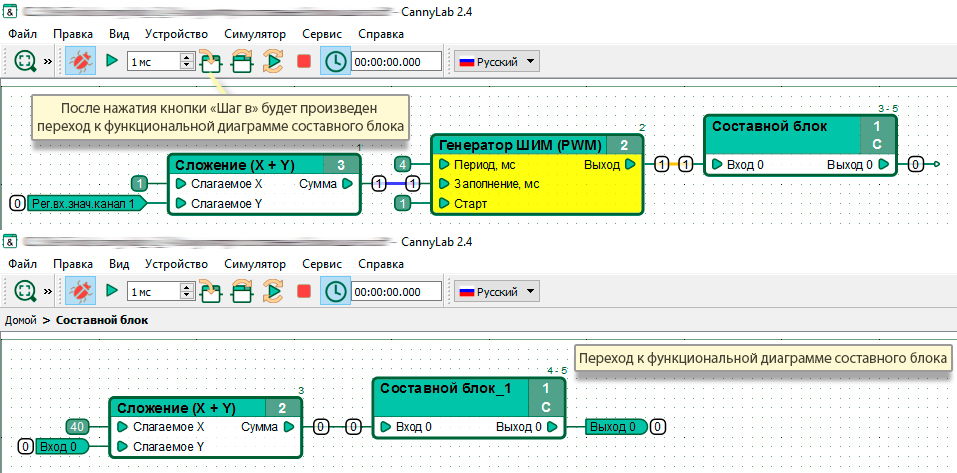
Step Over executes the composite block as if it were any other function block and pauses the execution in the main diagram.
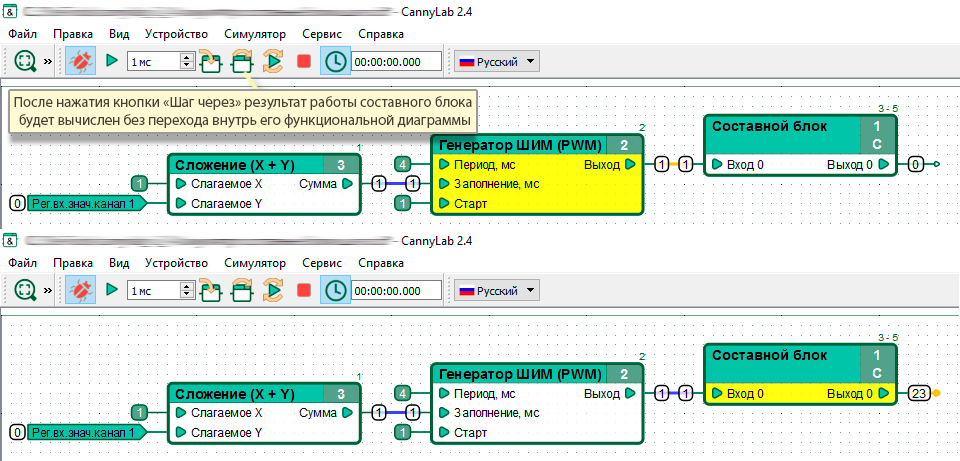
Both options work identically when it comes to executing regular function blocks.
Another change in the simulator is the removal of the «Show block» command. In CannyLab 2, tracking in the working area of the active function block is performed continuously.
More hotkeys and context menu items are now available in simulator mode:
- a breakpoint on a function block can now be set by double-clicking the left mouse button while holding down the «Ctrl» key;
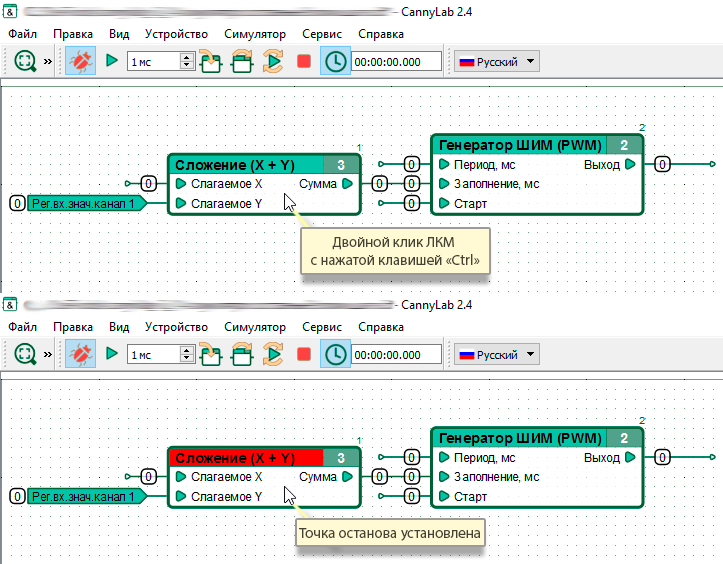
- context menu of the simulator now has a new command «Unlock All Values».

Errors and warnings
New tools have been added in CannyLab 2 to better handle errors and warnings that occur when developing function diagrams.
The «Diagram Check» option has been added to the «Tools» menu and to the toolbar:

This option allows you to manually start the procedure of checking the function diagram (including internal function diagrams of composite blocks) for errors and warnings.
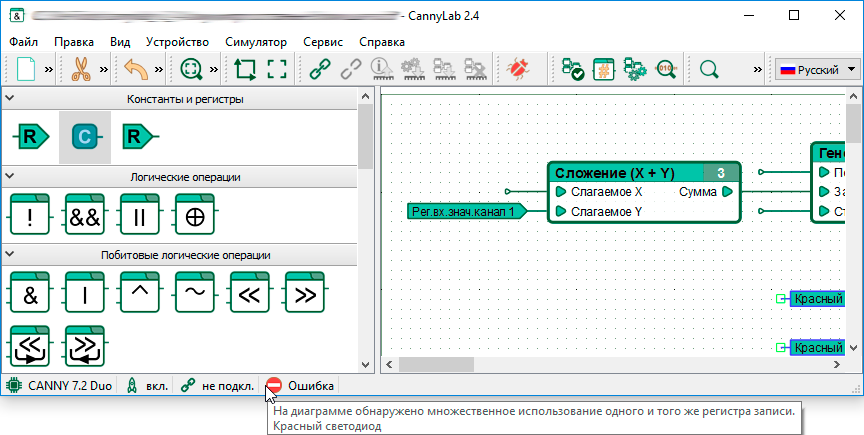
If, during the development of the diagram, an error was made related to the repeated use of the same output register in the function diagram, the name of this register will be indicated in the error message:

The status bar now also displays a notification about an error or warning; hovering over the notification will show the last error/warning message.
Create SFX
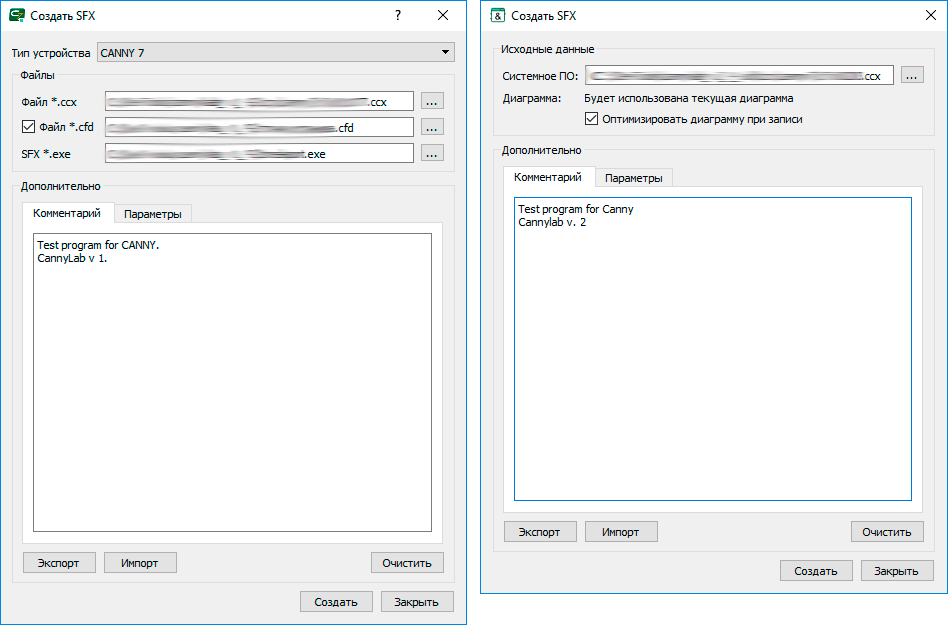
In the updated version of the «Create SFX» dialog box, you do not need to select the type of device the SFX archive is made for, it is implicitly set by the firmware file you choose. The name of the SFX archive is indicated after clicking «Create».
Diagram optimization for the SFX file can be enabled or disabled.
